Batch Metadata Modifier Tool
– Help Documentation –
The Batch Metadata Modifier Tool allows knowledgeable metadata professionals to modify individual or multiple XML files simultaneously. The tool has find/replace capabilities, can delete metadata elements, and can import metadata elements from external files. Thumbnails can also be generated for a batch of selected geodatabase objects within ArcCatalog.
This tool is in a research and development state. It should be used with caution. Use this tool at your own risk. INSIDE Idaho, the University of Idaho Library, and the University of Idaho are not responsible for errors that may occur.
Contact Bruce Godfrey (bgodfrey@uidaho.edu, Ph. 208-292-1407) if you have questions or wish to collaborate on further developing this tool.
Some practical examples: |
Notes:
|
Download the ArcGIS Add-In and stand-alone Windows executable
(Batch Metadata Modifier Tool)
There are two ways to launch the Batch Metadata Modifier Tool:
The stand-alone tool
Unzip the downloaded folder and double-click the executable file, "MetadataModifier Form.exe", to launch the tool.
-
The stand-alone tool can also be launched from ArcCatalog by pressing the tool button with no items selected.
The ArcGIS Add-In
Unzip the downloaded folder.
Open ArcCatalog. From the navigation bar, select Customize → Add-In Manager.
-
Locate and add the Batch Metadata Modifier Tool Add-In, "ArcCatalogMetadataModifier.esriAddIn".
-
Use Customize to add the Batch Metadata Modifier Tool icon
 to the ArcCatalog toolbar.
Click this icon to launch the tool.
Upon launching the Batch Metadata Modifier Tool, the following window will open:
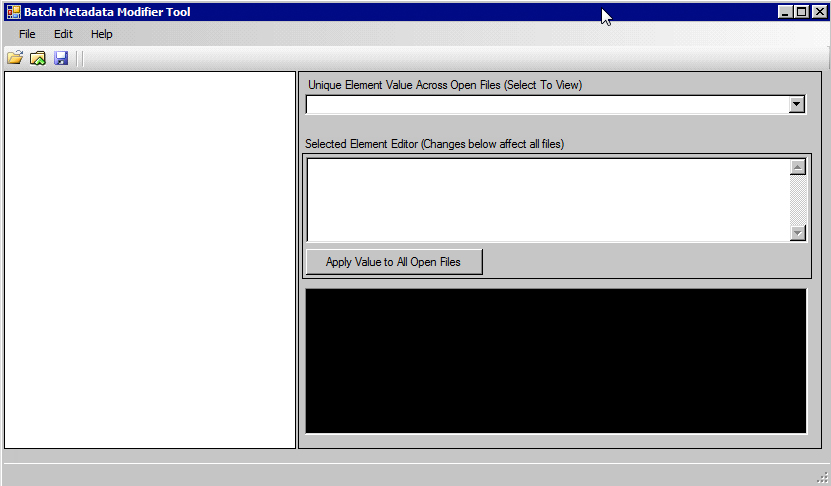
Click one of the folder icons (  or
or  ) in the upper left-hand corner of the window and select the xml metadata files you wish to edit. The first folder icon open individual files, while the second folder icon opens directories.
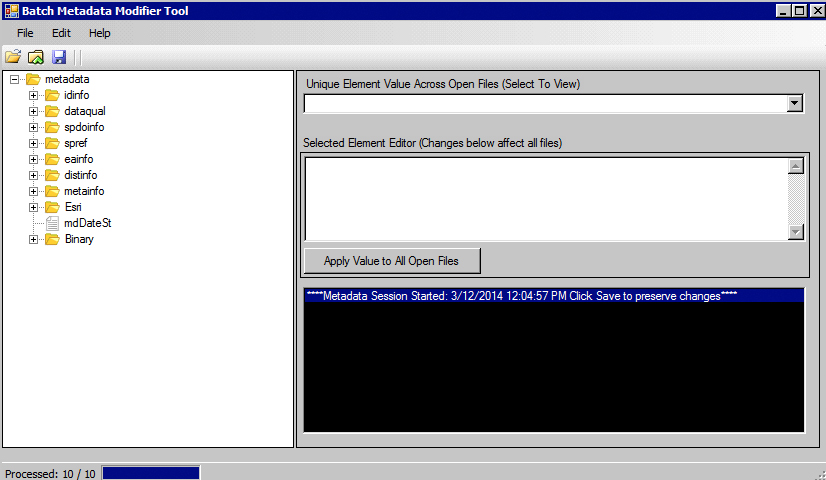
The number of files loaded will appear in the lower left, as illustrated below:
Executing a Simple FIND Command
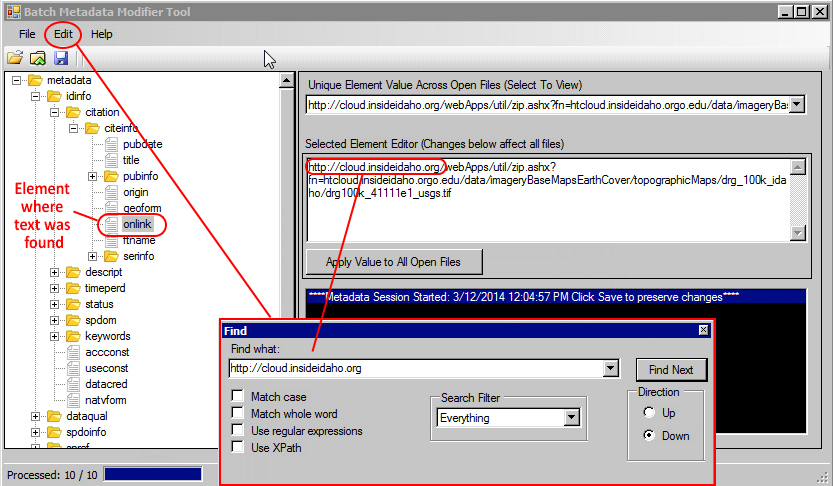
From the menu bar, select Edit → Find. In the pop-up window, enter the text you wish to find and click the button "Find Next". The metadata tree on the left side will expand and highlight the elements containing the requested text.
Note: You can search either the entire metadata tree or just within a single parent node by highlighting the appropriate node level before beginning your search.
[top]
Executing a Simple FIND and REPLACE Command
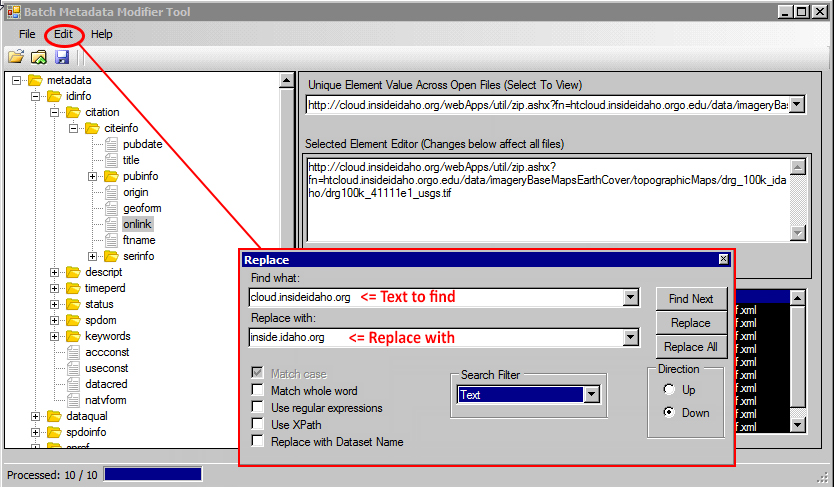
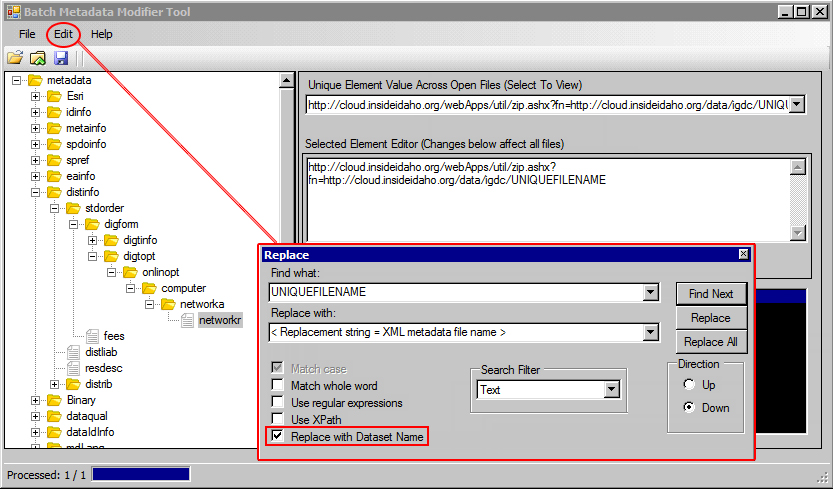
From the menu bar, select Edit → Replace. In the pop-up window, enter the text you wish to find and replace, then click the appropriate button "Find Next", "Replace", or "Replace All".
Notes:
- Be sure to click the Save
icon
 after each modification to preserve your edits.
 - Find and replace works on a single element or multiple elements (by highlighting desired node level in the metadata tree).
- Difference between Replace and Replace All: Replace will step through each occurrence of the string, whereas Replace All will immediately replace all occurances of string.
[top]
Replace with Dataset Name
The batch metadata modifier tool can be used to replace XML metadata file names through the "Replace with Dataset Name" checkbox. From the menu bar, select Edit → Replace. In the pop-up window, check the box next to "Replace with Dataset Name". By default, this replaces the string "UNIQUEFILENAME" with the name of a user-specified file (in order to establish a valid URL).
Notes:
- Be sure to Save
 your work after each modification.
 - Replace with Dataset Name only replaces the file name before the period and extension (so, for example, .shp isn't included in the replace)
[top]
Editing a Single Element in Multiple Metadata Files
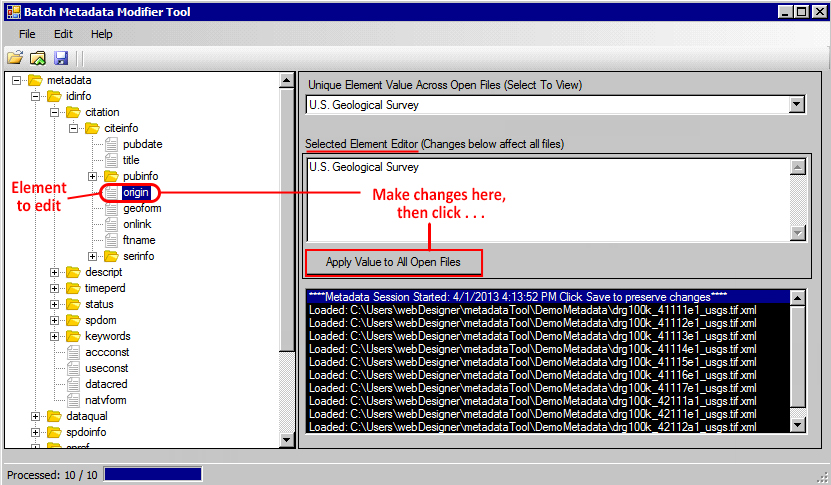
Another way to batch edit multiple files is to use the "Selected Element Editor" frame of the batch
metadata modifier tool. Using the metadata tree, navigate to and click on the element you wish to edit. Now, edit the text in the
"Selected Element Editor" box, and click on the button "Apply Value to
All Open Files". Finally, click the Save icon  to retain your edits.
[top]
Deleting Nodes or Elements
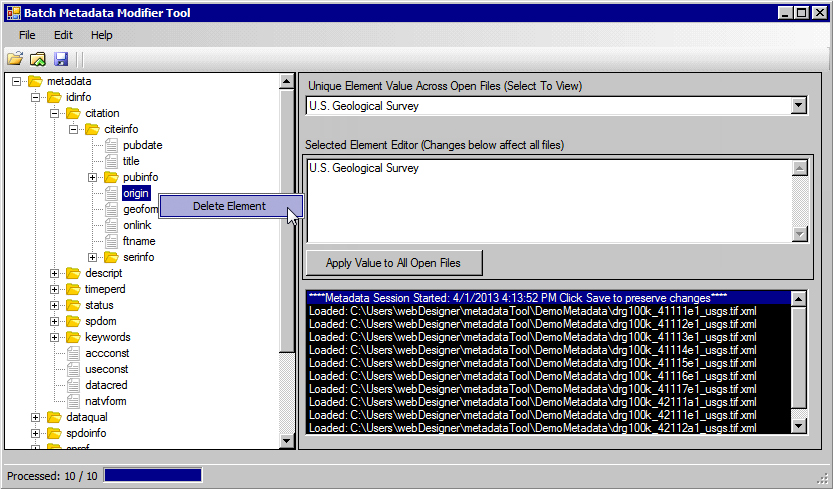
Nodes and elements may be deleted from the metadata tree by right-clicking on a parent node or element.
[top]
Importing Metadata Nodes from External Files
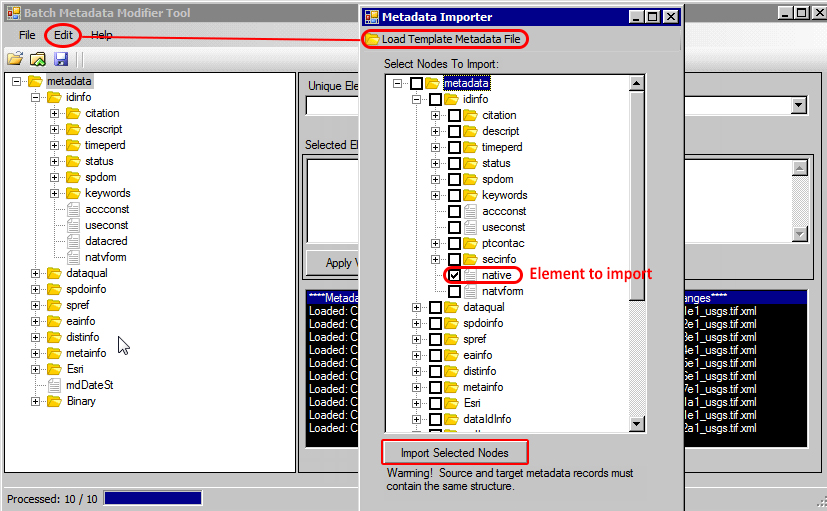
Metadata nodes contained in an external file can easily be added to a batch of metadata files. From the menu bar, select
Edit → Import Metadata. In the "Metadata Importer"
pop-up window, click  Load Template Metadata
File and select the external file containing the desired metadata nodes. Expand the resulting metadata tree and select the nodes to import. Click the
button "Replace" or "Append" (hover over each button for tool tips), then Save your work.
[top]
Batch Thumbnail Generation
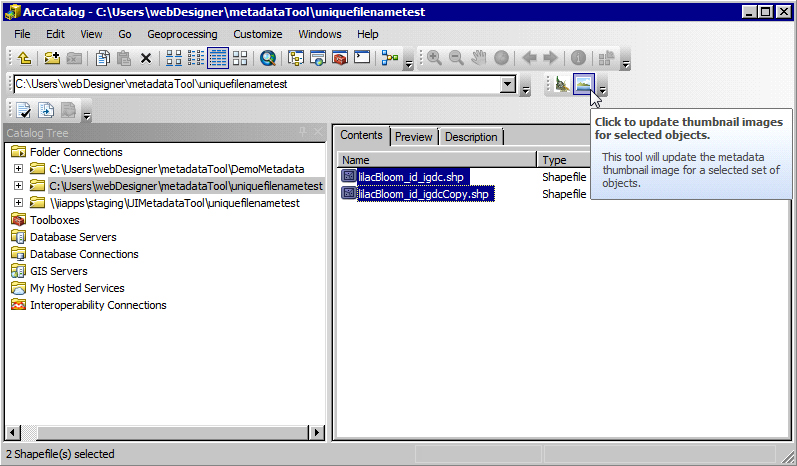
Thumbnails can also be generated (within ArcCatalog) for a batch of selected geodatabase objects. Open ArcCatalog and select from the Catalog Tree the folder containing the files for which you want to create thumbnails. From the right side of the window, click the Contents tab, and select the files for thumbnail generation. Now, click the ![]() icon from the toolbar.
icon from the toolbar.
[top]